
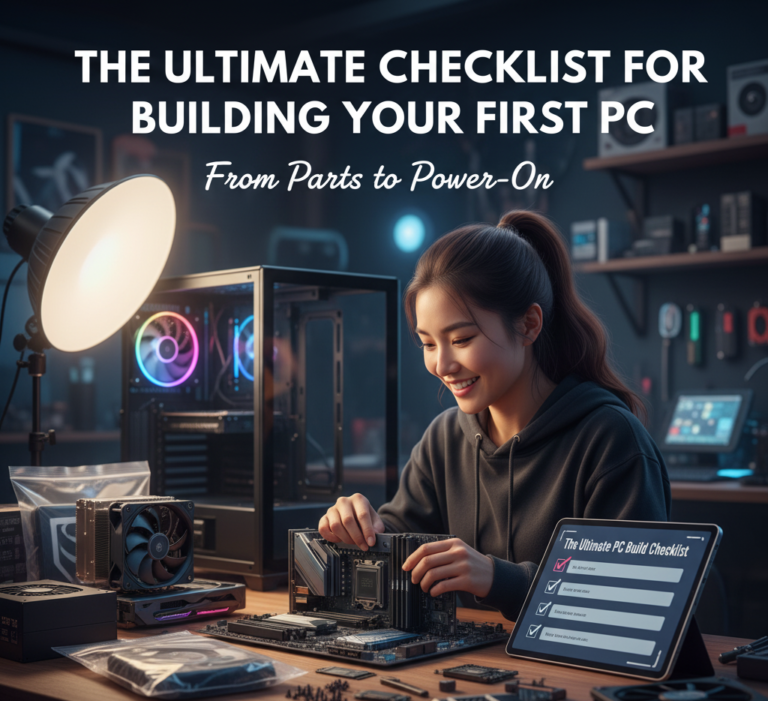
The Ultimate Checklist for Building Your First PC: From Parts to Power-Up
Building your own PC is a rite of passage. It is the moment you transition from a passive consumer of technology to an active creator. It’s not just about saving money (though you will); it’s about understanding the machine that powers your life. But let’s be honest: staring at a pile of expensive static-sensitive components can be terrifying.
Fear not. Whether you are building a workstation to run the best productivity apps or a gaming rig to rival the top budget laptops, this guide is your safety net. We have broken down the complex process into a 5-phase checklist system that guarantees success.
Why Build Your Own PC? The Case for DIY
Before a single component is chosen, it is worth understanding what you actually gain from building versus buying. Pre-built desktops and laptops serve a real need for many people—but they come with hidden costs and compromises that a custom build eliminates entirely.
When you buy a pre-built PC from a major manufacturer, you are paying for the convenience of assembly—but you are also paying for the manufacturer’s choice of components, which almost always includes cost-cutting in areas you cannot easily see. Budget pre-builds frequently include low-quality power supplies (the component most likely to fail and take other parts with it), soldered or non-upgradeable RAM, minimal storage that is slow or difficult to expand, and proprietary form factors that make future upgrades impossible or prohibitively expensive.
A custom build gives you complete control over every component. You choose the quality of the power supply. You choose how much RAM and whether it is expandable. You choose a case that has room to grow. You choose components with the best value-per-dollar rather than components chosen for manufacturing cost reduction. Over a 5-year ownership period, this control translates into a meaningfully more capable, more reliable, and more upgradeable machine.
The Upgrade Advantage
The most underappreciated benefit of a custom build is long-term upgradability. A well-chosen motherboard platform can support multiple generations of CPUs—meaning a CPU upgrade three years from now does not require replacing the motherboard, RAM, or case. This modular approach to hardware investment aligns with the same long-term financial thinking that applies to any major purchase: choose components that serve you well today and leave the door open for cost-effective improvements tomorrow.
Phase 1: The Planning Checklist
A successful build happens before you even buy a screwdriver. This phase is about strategy, budgeting, and compatibility.
1. Define Your Budget & Purpose
2. The Compatibility Check
Nothing hurts more than buying a CPU that doesn’t fit your motherboard.
Understanding Every Component: What You’re Actually Buying
The planning phase is only as good as your understanding of what each component does and how they interrelate. Many first-time builders over-invest in one area while leaving critical bottlenecks elsewhere. This section breaks down every major component, its role, and the key specifications that actually matter.
The CPU: The Brain of Your Machine
The Central Processing Unit (CPU) executes instructions. Nearly every action your computer takes—running applications, processing data, rendering a web page—ultimately passes through the CPU. Two factors dominate CPU performance: core count and clock speed. For most workloads, clock speed (measured in GHz) determines single-threaded performance, which governs how fast individual tasks execute. Core count determines multi-threaded performance—how well the CPU handles multiple simultaneous tasks or applications designed to use parallel processing (like video encoding, 3D rendering, or running multiple virtual machines).
Intel vs. AMD: The Core Choice
Intel (Core i5/i7/i9): Historically stronger single-core performance; excellent for gaming at high refresh rates. Uses LGA socket — CPU pins are on the motherboard, not the chip itself.
AMD (Ryzen 5/7/9): Typically stronger multi-core performance per dollar; excellent for content creation workloads. Uses AM5 socket — pins are on the CPU. Generally runs cooler at equivalent workloads.
How Much CPU Do You Actually Need?
- Office / web / light tasks: 6-core processor at any modern tier
- Gaming: 6–8 core, high clock speed (5.0 GHz+)
- Content creation (video): 12+ cores for export speed
- 3D rendering / ML: As many cores as budget allows
- Programming / development: 8–12 cores, generous RAM matters more
The GPU: The Visual Engine
The Graphics Processing Unit (GPU) handles rendering—converting geometric data into the pixels you see on screen. For gaming, the GPU is almost always the single most performance-determining component. For video editing, modern GPUs accelerate export times dramatically through hardware-accelerated encoding. For general office work, a discrete GPU is entirely optional—modern CPUs with integrated graphics handle web browsing, document editing, and video conferencing without strain.
The two primary GPU manufacturers are NVIDIA (GeForce RTX series) and AMD (Radeon RX series). NVIDIA currently holds an advantage in ray tracing performance and AI-accelerated features (DLSS). AMD typically offers better rasterization performance per dollar at mid-range price points. For content creators who use DaVinci Resolve or Adobe Premiere, verify which GPU family is better supported by your specific software before purchasing.
The GPU Bottleneck Trap
A GPU that is far more powerful than the CPU feeding it data will be starved of work—this is called a CPU bottleneck. A CPU that is far more powerful than the GPU cannot display frames fast enough to utilize its processing—a GPU bottleneck. Balanced builds pair components at similar tiers. A rough rule: at 1080p, CPU performance matters more; at 1440p and 4K, GPU performance becomes increasingly dominant because the rendering workload scales with resolution.
RAM: How Much and What Speed?
Random Access Memory (RAM) is the workspace your CPU uses to store actively needed data. Unlike storage, RAM is volatile—it is wiped when power is removed. More RAM allows more applications to run simultaneously without the system slowing down by swapping data to the much slower SSD. For modern builds, 16GB is the practical minimum; 32GB is the recommended sweet spot for longevity; 64GB+ is reserved for professional video editing, 3D rendering, or virtual machine workloads.
RAM speed (measured in MHz or MT/s) matters significantly for AMD Ryzen systems, where the CPU’s infinity fabric interconnect is tied to RAM speed—faster RAM directly improves overall system responsiveness. For Intel systems, the performance difference between RAM tiers is real but smaller. Always check your motherboard’s Qualified Vendor List (QVL) before purchasing RAM to ensure compatibility, especially with DDR5.
Storage: NVMe SSD vs. SATA SSD vs. HDD
Storage technology has a dramatic effect on day-to-day usability. Spinning hard drives (HDDs) remain relevant only for mass cold storage due to their low cost per terabyte. For the operating system and active applications, an NVMe SSD (which plugs directly into the motherboard’s M.2 slot) is the modern standard. The difference in real-world speed between an NVMe SSD and a traditional SATA SSD or HDD is immediately perceptible in boot times, application launch speeds, and file transfer operations.
| Type | Interface | Typical Read Speed | Cost per TB | Best Use |
|---|---|---|---|---|
| NVMe Gen 4 SSD | PCIe 4.0 M.2 | 5,000–7,000 MB/s | $60–$80 | OS, active projects, games |
| NVMe Gen 3 SSD | PCIe 3.0 M.2 | 2,500–3,500 MB/s | $50–$65 | Budget builds, secondary storage |
| SATA SSD | SATA III | 500–560 MB/s | $55–$75 | Older systems, secondary storage |
| HDD | SATA III | 100–180 MB/s | $18–$25 | Mass media storage, backups only |
The Motherboard: The Platform That Determines Everything
The motherboard is the central nervous system connecting all components. Its quality and feature set determine how expandable and future-proof your build is. Key specifications to evaluate include: the chipset (which governs available features and CPU compatibility), the form factor (ATX, Micro-ATX, or Mini-ITX—determines which cases fit and how many expansion slots are available), the number and type of M.2 slots for NVMe storage, RAM slot count and maximum supported capacity, and PCIe lane availability for GPU and expansion cards.
A critical decision: higher-tier chipsets (Intel Z790 vs. B760, or AMD X670 vs. B650) offer CPU overclocking capability, more M.2 slots, and additional USB ports. For most non-overclocking users, a mid-tier B-series motherboard delivers excellent value. Overbuying on the motherboard is a common mistake that diverts budget from the GPU or RAM where the performance impact would be more significant.
The PSU: The Component You Should Never Cheap Out On
The Power Supply Unit (PSU) is the most frequently underestimated component in a build—and the one where false economy carries the highest consequences. A cheap, low-quality PSU can deliver unstable voltages that corrupt data and shorten component lifespan. In failure scenarios, a substandard PSU can take other components with it. Budget on everything else if you must, but never on the PSU.
The 80 Plus certification system (White, Bronze, Silver, Gold, Platinum, Titanium) rates PSU efficiency at converting AC power to DC. An 80 Plus Gold PSU is 87–90% efficient at typical loads—the right balance of cost and quality for most builds. Choose a PSU from a reputable brand (Seasonic, Corsair, EVGA, Be Quiet!) with a multi-year warranty. Modular or semi-modular designs are strongly preferred—they allow unused cables to be removed, dramatically improving cable management and airflow.
Phase 2: The Toolkit Checklist
You don’t need a full garage of tools, but you do need a few specific items to avoid stripping screws or frying parts.

This is the industry standard for PC builders. It contains every bit you will ever need, including the essential Phillips #0, #1, and #2. Crucially, it comes with anti-static wrist straps and magnetic mats to keep you from losing tiny screws. It’s an investment that pays for itself by preventing damage.
Check Price on AmazonYour Workbench Essentials
Electrostatic Discharge (ESD): The Invisible Threat
Electrostatic Discharge is the most misunderstood risk in PC building. Most people picture a dramatic spark—the kind you see when touching a doorknob in winter. But ESD damage to computer components is almost always silent. A charge of several thousand volts is required before you feel a static shock; sensitive semiconductors can be damaged by as little as 100 volts of static discharge, which is completely imperceptible to the human body.
This means you can damage a component without feeling anything, seeing anything, or even knowing it happened. The damage may not manifest as immediate failure—it can appear weeks later as random crashes, instability, or degraded performance. This is called a “latent defect,” and it is the reason ESD prevention is taken seriously by professionals even though the risk feels abstract to beginners.
ESD Prevention Rules
- Wear an anti-static wrist strap connected to a grounded metal surface
- Work on a hard floor, not carpet
- Keep components in their anti-static bags until the moment of installation
- Handle PCBs by their edges, not the components or connectors
- Never place components on a regular table surface without an anti-static mat
- Do not work in excessively dry conditions (low humidity increases static risk)
The Most ESD-Sensitive Components
- CPU — extremely sensitive; handle by edges only
- RAM sticks — touch only the top edge
- M.2 SSD — avoid touching the gold contacts
- GPU — handle by the cooler body and PCIe bracket
- Motherboard — never place flat-side down on a conductive surface
- CPU cooler (if separate PCB) — treat as any other PCB
Phase 3: The Build Day Checklist
The parts have arrived. You have cleared your table. It’s time to build. Follow this order of operations to minimize stress.
Step 1: The “Test Bench” (Outside the Case)
Step 2: Case Prep & Installation

Many CPU coolers come with paste pre-applied, but if you mess up the installation, you’ll need extra. Arctic MX-6 is a high-performance, non-conductive paste that ensures your CPU stays cool. A pea-sized amount in the center of the CPU is all you need.
Check Price on AmazonCPU Cooling: Air vs. AIO Liquid — What You Actually Need
CPU cooling is one of the most contested topics in the PC building community, and the debate is far simpler than the arguments suggest. Your CPU generates heat as a byproduct of processing. If that heat is not dissipated, the CPU will thermally throttle—automatically reducing its speed to protect itself—which degrades performance. An inadequate cooler turns an expensive CPU into a component operating well below its potential.
| Cooler Type | Performance | Noise Level | Price Range | Best For |
|---|---|---|---|---|
| Stock (Included) | Adequate | Moderate–Loud | Free | Budget builds, non-overclocked CPUs |
| Air Cooler (Tower) | Good–Excellent | Quiet | $30–$100 | Most builds; best value |
| AIO Liquid (240mm) | Excellent | Very Quiet | $80–$160 | High-TDP CPUs, small cases, aesthetics |
| AIO Liquid (360mm) | Outstanding | Very Quiet | $120–$250 | Overclocked builds, enthusiast-tier CPUs |
| Custom Loop | Maximum | Near-Silent | $300–$800+ | Extreme overclocking, showcase builds |
For the majority of first-time builders, a quality tower air cooler in the $40–$80 range—such as the Noctua NH-U12S or the be quiet! Dark Rock 4—delivers excellent thermal performance, lower noise levels than most AIO liquid coolers, and significantly greater long-term reliability (no pump to fail, no tubing to degrade). The “air vs. liquid” debate has been largely settled by thermal testing: a high-quality air cooler matches or exceeds a 240mm AIO in sustained workloads. Liquid cooling’s advantages appear primarily in peak transient performance and in compact cases where a tall air cooler would not fit.
Step 3: The Power & GPU
Cable Management and Airflow: The Invisible Performance Factor
Cable management is the step most beginners rush—and it is the one that most visibly separates a professional-looking build from an amateur one. But cable management is not just aesthetic. Cables that block airflow paths inside a case raise temperatures, which increases fan speed (and noise) and in extreme cases causes thermal throttling. A well-managed build runs cooler, quieter, and more reliably.
The fundamental principle of PC airflow is creating a consistent pressure and direction for air movement. Most builds use a “positive pressure” or “balanced” approach: intake fans at the front and bottom draw cool air in; exhaust fans at the rear and top push warm air out. The CPU cooler and GPU are positioned in this airflow path so they are bathed in fresh cool air. Cables that cross this path obstruct flow and create turbulence, creating warm spots.
Phase 4: The “First Boot” Checklist
The hardware is done. Now for the moment of truth.
The Pre-Flight Check
Navigating the BIOS: The First Configuration Step
When your system posts successfully and the BIOS screen appears, resist the urge to immediately install Windows. The BIOS is where several critical configuration steps happen that will define how your system performs from day one.
Step 1 — Verify Component Detection
Confirm the BIOS recognizes your CPU at its correct model and speed, your RAM modules at their installed capacity, and your NVMe SSD. If any component is not detected, it indicates a seating or compatibility issue to resolve before proceeding.
Step 2 — Enable XMP or EXPO
RAM ships configured to run at its lowest-certified speed (typically 4800 MT/s for DDR5 or 2133 MT/s for DDR4) regardless of what speed the kit is rated for. To run at the advertised speed, you must manually enable XMP (Intel) or EXPO (AMD) in the BIOS. This single setting is responsible for a significant proportion of “my RAM isn’t running at the right speed” complaints. It is a one-click toggle that delivers meaningful real-world performance improvement at zero additional cost.
Step 3 — Check Fan Curves
Most modern BIOS interfaces allow you to configure how aggressively fans ramp up in response to temperature. The default fan curves are often either too aggressive (loud at idle) or too passive (allowing higher temperatures than necessary under load). Configure a custom curve that keeps fans at low speed until temperatures reach 60°C, then ramps steadily to full speed by 80–85°C.
Step 4 — Update the BIOS
Motherboard manufacturers release BIOS updates that add CPU compatibility, fix bugs, and improve stability. After the initial POST, connect to the internet and check the manufacturer’s website for the latest BIOS version. Most modern motherboards support BIOS flashing directly from a USB drive through the BIOS interface itself. This is particularly important for AMD platforms where CPU support is frequently expanded through BIOS updates.
Step 5 — Install the Operating System
Create a Windows installation USB using the official Microsoft Media Creation Tool on another computer. Boot from the USB (select it as the boot device in the BIOS boot menu), and follow the installation wizard. Select your NVMe SSD as the installation target. The entire process takes 20–30 minutes.
Software & Security
Once Windows is installed, you need to secure your new asset.
The Correct Driver Installation Order
Installing drivers in the wrong order—or skipping steps—is one of the most common sources of instability in new builds. The correct sequence minimizes conflicts and ensures each component is recognized and configured properly before dependent software is installed:
- Windows Updates: Run Windows Update to completion before installing any third-party drivers. This ensures the OS has the latest security patches, .NET frameworks, and DirectX components that drivers depend on.
- Chipset Drivers: Install motherboard chipset drivers first. These establish the foundational communication infrastructure between the CPU, RAM, and storage controller that all subsequent drivers rely on.
- GPU Drivers: Install the graphics driver second. Use DDU (Display Driver Uninstaller) in safe mode if you are replacing an existing GPU installation—legacy driver fragments are a common source of graphics instability.
- Network Drivers: If not already functional after chipset installation, install LAN and/or Wi-Fi drivers.
- Audio Drivers: Install Realtek or equivalent audio drivers from the motherboard manufacturer’s support page.
- Peripheral Drivers: Install drivers for your keyboard, mouse, headset, and other peripherals last.
Benchmarking: Verify Your Build Performs as Expected
Once all drivers are installed, run a suite of benchmarks to verify that your components are performing at expected levels and that temperatures under load are within safe ranges. This process, called “validation,” catches problems early—before you have invested hours configuring software and transferring data—when troubleshooting and component returns are still straightforward.
- CPU stress test: Cinebench R23 (free) — compare your multi-core and single-core scores against published results for your CPU model.
- GPU benchmark: 3DMark TimeSpy (free tier) — compare against published scores for your GPU.
- RAM validation: Verify RAM is running at XMP/EXPO speed in CPU-Z (free).
- Storage speed: CrystalDiskMark (free) — verify NVMe SSD is achieving expected sequential read/write speeds.
- Temperature monitoring: HWiNFO64 (free) — log maximum temperatures during stress testing. CPU should not exceed 90–95°C under full sustained load; GPU should not exceed 83–85°C.
Phase 5: Common Mistakes to Avoid
- Forgetting XMP/EXPO: Your high-speed RAM will run at slow default speeds unless you enable “XMP” (Intel) or “EXPO” (AMD) in the BIOS.
- Daisy-Chaining GPU Cables: Use two separate cables from the PSU to your GPU, not one cable with a splitter, for high-end cards.
- Over-spending: Don’t blow your budget on RGB lights. Follow the 7 habits of people who are good with money and prioritize performance per dollar.
Troubleshooting: When Things Don’t Work
A first build that does not POST (Power-On Self-Test) on the first attempt is not a disaster—it is a normal part of the learning process. The vast majority of first-boot failures have simple causes that are resolved in minutes. The key is systematic diagnosis rather than panic-driven disassembly.
No Power at All
If nothing happens when you press the power button—no fans spin, no lights appear—the issue is almost always one of four things: the PSU switch on the back of the unit is in the “O” (off) position rather than “I” (on); the front panel power button connector is plugged into the wrong pins on the motherboard (check the motherboard manual carefully); a power cable is not fully seated; or, rarely, the wall outlet being used is not functioning.
Fans Spin But No Display
This is the most common first-boot failure mode. Work through this checklist systematically:
- Confirm the monitor cable is plugged into the GPU, not the motherboard’s video output.
- Confirm the monitor is turned on and set to the correct input source.
- Try reseating the RAM—remove the sticks, clean the contacts with a pencil eraser, and reinstall firmly until both clips click.
- Try booting with a single RAM stick in the primary slot (usually slot A2—check the manual).
- Check the motherboard’s debug LED or POST code display (most modern boards have these) to identify which component is causing the hang.
- Reseat the GPU—remove and reinstall the card to ensure full PCIe contact.
- If the CPU cooler was installed before the motherboard was placed in the case, verify the cooler did not prevent the motherboard from seating flat against the standoffs.
The Bare Minimum Boot Test
When troubleshooting, strip the system down to the absolute minimum required to POST: motherboard, CPU with cooler, one stick of RAM, PSU, and a monitor connected to the GPU (or integrated graphics if no discrete GPU). Remove all storage drives, additional RAM sticks, and any expansion cards. If the system POSTs in this minimal configuration, add components back one at a time until the fault reappears—you have then isolated the problematic component.
System POSTs but is Unstable or Crashing
Post-installation instability—random crashes, blue screens, application freezes—typically has one of three causes: RAM running at incorrect speeds or voltages (often cured by enabling XMP/EXPO), inadequate cooling causing thermal throttling or shutdown, or a driver conflict from incorrect installation order. Running HWiNFO64 during a stress test will show if temperatures are the cause. Memory testing with MemTest86 (bootable from a USB drive) will identify RAM errors. Reinstalling GPU drivers using DDU in safe mode resolves most graphics-related crashes.
Frequently Asked Questions: First PC Build
Windows 11 can be installed and used without a license key—Microsoft allows unlicensed use with minor limitations (a watermark and inability to personalize certain settings). A genuine license can be purchased and applied later. Alternatively, a Linux distribution (Ubuntu, Fedora, or Linux Mint) is completely free, extremely capable for productivity and development work, and increasingly supported for gaming through Steam’s Proton compatibility layer. For users whose primary use case is office productivity, content creation, or development, Linux is a viable and cost-free alternative worth serious consideration.
For general productivity (office applications, web browsing, video calls): 16GB is comfortable, 32GB is future-proof. For gaming: 16GB covers all current titles; 32GB provides headroom for memory-intensive games and running a browser simultaneously. For content creation (video editing, 3D rendering): 32GB minimum; 64GB recommended if working with 4K+ footage. For software development with virtual machines: 32–64GB depending on how many VMs run simultaneously. More RAM is almost never harmful; too little RAM causes the system to use the SSD as slow memory overflow (page file), which dramatically degrades performance.
CPUs and RAM are excellent candidates for buying used — they are extremely robust components with very long service lives and no mechanical wear. GPUs can be good value but require scrutiny: cards used extensively for cryptocurrency mining may have degraded VRAM from sustained high-temperature operation. Avoid used PSUs entirely — a failing PSU purchased cheaply can damage expensive new components. Never buy a used SSD without running CrystalDiskMark to verify health status. Used motherboards carry moderate risk due to potential trace damage or bent CPU socket pins not visible in listing photos.
PCPartPicker.com is the definitive compatibility tool for PC building. It maintains a database of components with compatibility rules that automatically flag issues — mismatched CPU sockets, RAM incompatibility, power supply inadequacy, case size conflicts, and cooler clearance problems. Building your parts list in PCPartPicker before purchasing any component eliminates virtually all compatibility surprises. The site also aggregates current pricing across major retailers, making it a price comparison tool as well.
One of the core advantages of a custom build is component-level upgradeability. Most upgrades are straightforward: adding more RAM is plug-and-play; replacing an SSD is a five-minute operation; swapping a GPU requires only unscrewing the old card and seating the new one. CPU upgrades are platform-dependent — Intel and AMD release multiple CPU generations on the same motherboard socket before moving to a new platform, typically giving a build window of 2–3 CPU generations of upgradeability. Plan your initial build with a motherboard that supports the next generation of CPUs on your chosen platform for maximum upgrade longevity.
Failing to enable XMP or EXPO in the BIOS after the first boot. This leaves RAM running at a fraction of its purchased speed — a $150 DDR5-6000 kit running at DDR5-4800 because of a missed single BIOS toggle. The second most common mistake is plugging the monitor into the motherboard’s video output rather than the GPU. The third is skipping the test bench step and building directly into the case, making troubleshooting dramatically more difficult if a component issue arises.
Final Verdict: You Built It, You Own It
Building a PC is more than assembling parts; it’s building confidence. You now own a machine that is tailored to your needs, whether that’s gaming, coding, or managing your investment accounts.
Take a moment to appreciate your work. You didn’t just buy a computer; you created one. You understand how every component functions, how they interrelate, and how to diagnose and fix problems when they arise. You have traded a one-time convenience for a lifetime of capability—the ability to upgrade, repair, repurpose, and understand your most essential productivity tool at a level that no pre-built buyer ever achieves.
Now, sit back, boot up, and enjoy the speed.
Your Long-Term Maintenance Schedule
A custom PC requires minimal maintenance to perform at its best indefinitely. Every 6–12 months: open the case and use compressed air to clear dust from heatsinks, fan blades, and filters (dust buildup is the primary cause of rising temperatures over time). Every 2–3 years: consider reapplying thermal paste to the CPU, as the original application dries out and loses effectiveness. Annually: run your benchmark suite to verify performance has not degraded. Following this simple schedule preserves the performance you built from day one for the full lifetime of the machine.